10 Common Archery Mistakes You Can Fix Today For Better Results
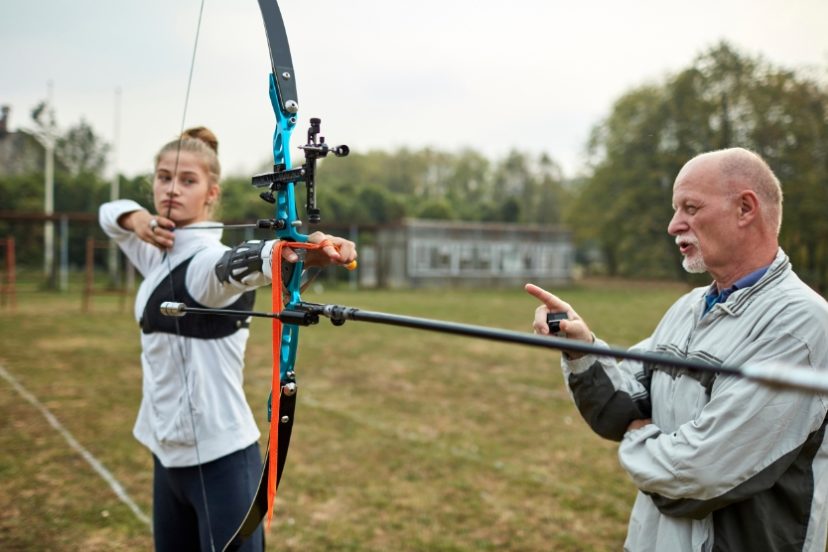
If you’re new to archery, chances are you’ve already discovered how addictive this sport can be.
The quiet focus, the satisfying thunk of the arrow hitting the target, and the challenge of getting just a little better with every shot—it’s all part of the magic.
But let’s be honest: archery can also be frustrating. One day you feel like Robin Hood, the next day you can’t hit the broad side of a barn.
The truth is, most beginners (and even some experienced shooters) fall into the same traps.
These common archery mistakes sneak into your routine without you realizing it, and they can hold back your progress for weeks or even months.
Once you know what they are and how to fix them, your accuracy and consistency improve fast.
Today, we’re breaking down 10 common archery mistakes you can fix.
We’ll cover why each mistake happens, how to spot it in your shooting, and give you practical tools to correct it—without overcomplicating things.
Let’s dive in and start hitting more bullseyes.
1)) Poor Stance and Foot Positioning
Your stance is the foundation of every shot. If your feet aren’t set correctly, everything else becomes harder: balance, alignment, and follow-through.
Many beginners overlook this because they’re eager to focus on the bow, but ignoring your stance is like trying to build a house on sand.
Stance Fix-It Checklist
- Feet shoulder-width apart: Too close, and you wobble. Too wide, and you lock up.
- Weight evenly distributed: Avoid leaning on your back foot. Think of standing tall and balanced.
- Open stance for clarity: A slightly open stance (front foot a little back) often gives you better alignment with the target.
Quick Hack: Draw a chalk line on the ground or use tape at the range to practice consistent foot placement.
Example: If your arrows keep drifting left or right despite good aim, your stance might be the hidden culprit. Correct your feet first before tinkering with your bow settings.
2)) Gripping the Bow Too Tightly
One of the sneakiest common archery mistakes is the “death grip.” When you clutch the bow too hard, you introduce tension that throws off your shot.
A bow should rest naturally in your hand, not be strangled by it.
How to Master a Relaxed Grip
- Think “handshake, not chokehold”: Hold the bow like you’d shake someone’s hand—firm but relaxed.
- Let the bow do its job: Trust your bow’s natural balance instead of muscling it.
- Use a wrist sling: If you’re afraid of dropping your bow, a wrist sling can give you confidence to keep the grip light.
Pro Tip: Film yourself shooting from the front. If your knuckles are turning white, you’re gripping too hard.
Best Practice: A relaxed bow hand not only improves accuracy but also reduces fatigue, letting you practice longer.
3)) Incorrect Anchor Point
Your anchor point is like a personal fingerprint in archery—it’s unique to you but needs to stay consistent every single shot.
Beginners often float between different anchor points (corner of the mouth, chin, cheekbone), which leads to unpredictable arrow flight.
Anchor Point Stability Tips
- Pick a spot and stick to it: The corner of your mouth or under your chin are common choices.
- Use multiple reference points: Combine touch points like nose-to-string + finger-to-mouth for extra consistency.
- Close your eyes drill: Draw with your eyes closed, anchor, then open to check if you’re in the same spot.
Warning: Shifting anchor points even slightly changes arrow trajectory. It’s like moving your rifle sight between every shot.
Example Worksheet:
- Anchor spot: __________
- Secondary reference: __________
- Consistency check (10 shots): How many matched?
4)) Rushing the Shot
Impatience is an archery killer. Many new archers draw, aim, and release in a matter of seconds, hoping speed equals accuracy.
But rushing often leads to flinching, poor form, and missed targets.
Slow-It-Down Ideas
- Breathe first: Inhale deeply, exhale halfway, then settle before releasing.
- Use a mental countdown: Try “draw, anchor, aim, breathe, release.”
- Quality over quantity: Ten well-executed arrows beat fifty sloppy ones.
Resource Tip: Some archers use a shot timer app—not to shoot faster but to track if they’re rushing under stress.
Swipe Idea: Post a sticky note in your case: “Patience = Precision.” A small reminder can change your mindset.
5)) Misaligning the Sight or Peep
Even if you’ve got great form, if your sight or peep alignment is off, your arrows won’t land where you want.
Beginners often peek over their sight or shift their head slightly, throwing everything off.
Alignment Hacks
- Line up the circles: Make sure the peep, sight housing, and target all align concentrically.
- Practice “head freeze”: Once anchored, don’t move your head—move the bow instead.
- Check peep height: If you’re straining to see through it, adjust the peep, not your head.
Best Practice: Consistency trumps perfection. Pick one sight picture and repeat it religiously.
Warning: Don’t chase every miss by adjusting your sight. Fix your form first before tinkering with the gear.
6)) Flinching at Release
Releasing the arrow should be smooth and controlled, but many beginners flinch at the last second.
This happens when nerves or anticipation take over. It’s one of the most common archery mistakes because you don’t always realize you’re doing it.
Anti-Flinch Training
- Blank bale practice: Shoot at a target just a few feet away. With no pressure to “hit,” focus on a smooth release.
- Surprise yourself: Try a mechanical release aid set to trigger unpredictably.
- Focus on follow-through: Instead of worrying about the shot, think about holding your form for a second after release.
Example Drill: Fire 20 arrows blind bale, eyes closed, focusing only on release. Record how much smoother your shooting feels afterward.
7)) Inconsistent Draw Length
Draw length determines how far you pull back your string. Too short, and you lose power and accuracy.
Too long, and your form collapses. Many beginners either don’t know their correct draw length or change it unconsciously from shot to shot.
Draw Length Fix Tools
- Get measured properly: A pro shop can set your exact draw length.
- Check your elbow: At full draw, your rear elbow should point straight back, not outward.
- Consistency marker: Use kisser buttons or nose-to-string contact to repeat your draw length every shot.
Pro Hack: Mark your bowstring lightly with a serving thread at your anchor point. If you pull past it, you’ll know.
Example: If your arrows fly inconsistently high or low, varying draw length could be to blame.
8)) Ignoring Follow-Through
Many beginners release the string and immediately drop their bow arm or move their head to “check the shot.”
This small habit ruins accuracy because it interrupts the arrow’s path. Follow-through ensures the arrow leaves the bow cleanly.
Follow-Through Best Practices
- Hold for 2 seconds: After release, freeze your position until the arrow hits.
- Watch the arrow in flight: Keep your eye on the target, not your bow.
- Practice without arrows: Dry fire form drills (without actually releasing the string) to ingrain muscle memory.
Warning: Never actually dry fire a bow with no arrow—it can damage your equipment. Use simulated form drills safely.
Resource Idea: Record a slow-motion video to analyze whether your bow arm stays steady post-release.
9)) Using the Wrong Arrows
You could have perfect form, but if your arrows don’t match your bow setup, accuracy suffers.
Many beginners grab whatever arrows are available, not realizing that spine, length, and tip weight make a huge difference.
Arrow Selection Guide
- Check spine charts: Arrow stiffness should match your bow’s draw weight.
- Length matters: Arrows too short can be dangerous; too long reduces efficiency.
- Match the tip weight: Heavier tips fly differently than lighter ones—experiment to see what shoots best for you.
Hack: Label your arrows with a marker if you mix different sets. Inconsistent arrows equal inconsistent groups.
Best Practice: Always buy arrows in batches matched to your bow’s specs, not random singles.
10)) Skipping Warm-Up and Practice Drills
Archery is a physical sport, and yet many beginners dive right in without warming up.
This leads to fatigue, sloppy form, and preventable injuries. Just like in any sport, preparation matters.
Warm-Up Routine Ideas
- Stretch shoulders and back: Simple arm circles and band stretches work wonders.
- Do 5–10 draw-and-holds: Practice holding full draw for 5 seconds before releasing.
- Start with close targets: Begin at 10 yards to dial in your form before moving farther back.
Template Routine:
- 5 minutes of stretching
- 5 minutes draw-and-holds
- 10 arrows blank bale
- Move to distance shooting
Warning: Ignoring warm-ups is one of those common archery mistakes that creeps up in the form of sore shoulders or poor consistency later.
Pro-Tip: Invest in Quality Equipment Early
One of the best ways to avoid frustration as a beginner is to start with reliable, quality archery equipment.
Cheap or mismatched gear can make even the most focused practice sessions feel discouraging, because the equipment itself is working against you.
When your bow and accessories fit your body and shooting style, learning becomes smoother, your confidence builds faster, and your results improve dramatically.
If you’re not sure where to begin, take a look at these resources on archery bows and archery equipment.
They’re a great starting point for researching the different types of bows, arrows, and accessories available, so you can make informed decisions before you buy.
Think of it as setting yourself up for long-term success—because the right gear isn’t just equipment, it’s part of your growth as an archer.
Conclusion
Archery doesn’t have to be complicated. Most of the time, the biggest breakthroughs come from fixing the simplest mistakes.
By addressing your stance, grip, anchor point, timing, and equipment, you’ll see a huge difference in your shooting almost immediately.
You don’t have to master everything at once. Pick one or two mistakes to focus on each week.
With patience, consistent practice, and the right mindset, you’ll turn those frustrating misses into satisfying bullseyes faster than you think.
So the next time you head to the range, keep these 10 common archery mistakes in mind.
Fix them one by one, and you’ll not only shoot better—you’ll enjoy the sport more.
